Home / Integration plugins / OpenNMS SMS Integration

OpenNMS SMS notifications – integration manual

Here we describe how to setup OpenNMS with SMSEagle for SMS notifications.

SMSEagle is an offline hardware SMS gateway. Therefore no external connection to 3rd party system is required. All notifications are generated on-premise and sent directly to a cellular network. This solution can be used in secure installations without Internet access.

SMSEagle Setup

  1. Create a new user for this script in OpenNMS.

OpenNMS Setup

Create a User
Click the Admin link in the menu bar, go to Configure Users, Groups and On-Call Roles, and then click Configure Users.
Then, click the Add New User link, and enter a username and password in the form, then click OK. Next, fill out the relevant user information.
Finally, click Finish down at the bottom of the form.

Destination Paths
To receive a notification, your user or a group that your user is in needs to be a part of a destination path. A destination path helps OpenNMS determine who is eligible to receive a particular notification, depending on user name, groups, duty schedules, and other rules.
Go to the Admin page, click Configure Notifications in the Operations section, then Configure Destination Paths, then click the New Path button.
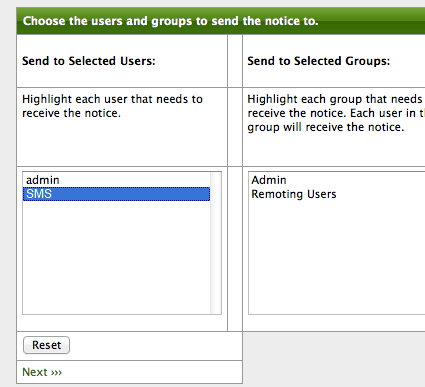
Give it a name, like SMS, then click Edit. Add your new user by selecting it, then click Next >>>.

On the next page, leave the defaults (javaEmail and on) and click Next >>> again.

Finally, click Finish and you should see your new tutorial path in the Existing Paths section.

Event Notifications
Go to the Admin page, click Configure Notifications in the Operations section, then Configure Event Notifications. In here you ‘ll see a list of events which are configured for notifications, some of which are turned off. You can create a new event notification by clicking the Add New Event Notification> button near the top.
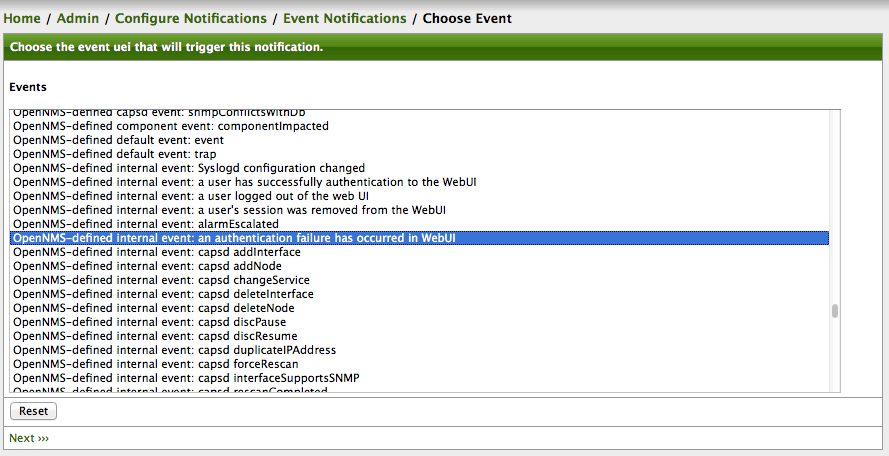
Click the Add New Event Notification button at the top of the Event Notifications page. From Events choose OpenNMS-defined internal event: an authentication failure has occurred in WebUI.

Then click Next >>>.

On the next page, you can build a rule for matching a set of IP addresses and/or services. In this case, we’re just matching an internal OpenNMS event, so we’ll continue on and click Skip results validation >>>.
Finally, you can configure the information used to send the notification. Fill in the following values:

  • Name
    authenticationFailed
  • Choose A Path
    Tutorial
  • Text Message
    The OpenNMS Web UI had a failed login attempt, by user ‘%parm[user]%’, from IP address %parm[ip]% (Exception message: %parm[exceptionMessage]%)
  • Short Message
    Authentication failed by user %parm[user]% (Notice #%noticeid%)
  • Email Subject Authentication Failed (Notice #%noticeid%)

And then click Finish.

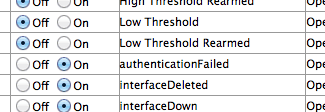
You should now see your notification event in the list, but it will be disabled. Set the radio button to On to enable it, and you should be ready to send a notification.

Configure Mail

Unless you have an SMTP server running on your OpenNMS host, you will need to configure mail before notifications will work. Mail configuration for notifications is in the $OPENNMS_HOME/etc/javamail-configuration.properties file. In most cases, you should only have to change a few lines to point it at your mail server:


# This is the e-mail address that OpenNMS puts in the “From” field:
org.opennms.core.utils.fromAddress=FROM-EMAIL-ADDRESS
org.opennms.core.utils.mailHost=MAIL-SERVER-IP

Also, if your mail server requires authentication for sending, see the section under “These properties define the Mail authentication.” and edit them as appropriate for your environment.

Enable Notifications

By default, OpenNMS ships with notifications disabled, so you don’t get them accidentally as you’re just setting things up. The last thing you need to do once you have things configured as you like is to enable notifications.
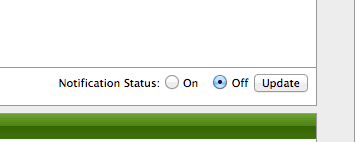
In the main OpenNMS Admin page, there is a radio selector labeled, Notification Status. Change it to On and click update.

SMSEagle as SMTP Server (optional)

For sending e-mail messages you can use SMTP server installed on the SMSEagle device. Then the configuration of SMTP server is as follows:

  • SMTP host: IP address of your device
  • SMTP port: 25
  • Authentication: SMSEagle SMTP server doesn’t require authentication
  • Encryption: none

SMTP server on the SMSEagle device will accept messages addressed for it only. The other messages will be rejected.

What is hardware
SMS Gateway?

Learn more about
SMSEagle features

Explore SMSEagle Demo device

SMSEagle is a hardware & software solution that guarantees a swift delivery of your messages to designated recipients, whether it’s for notifications, alerts, or important updates.

After registering to a demo you get a remote access to our physical device NXS-9750.

  • 14-days free trial
  • Access to over 20 functionalities