Home / Integration plugins / Microsoft Exchange SMS Integration

Microsoft Exchange – SMS & voice call integration manual

Here we describe how to setup Microsoft Exchange server for SMS sending using SMSEagle. It should take you about 5 min to have it up and running.

This tutorial is based on MS Exchange knowledgebase article. It uses Send Connector to forward traffic from MS Exchange to SMSEagle.

SMSEagle is an offline hardware SMS gateway. Therefore no external connection to 3rd party system is required. All notifications are generated on-premise and sent directly to a cellular network. This solution can be used in secure installations without Internet access.

SMSEagle Setup

This integration will use Email To SMS plugin (see details: Email To SMS plugin). This plugin is included in each version of SMSEagle device.
  • Enable Email To SMS plugin in web-GUI > menu Emails > Email to SMS > Settings tab.
  • Create a forwarding rule in the Rules tab. You can forward all emails to SMS or emails from specific domains.

Microsoft Exchange server setup

Open the Exchange Management Console on a computer that has the Hub Transport server role.
  1. In the console tree, expand Organization Configuration, select Hub Transport, and then click the Send Connectors tab in the work pane.
  2. In the action pane, click New Send Connector.
     The New SMTP Send Connector wizard starts.
  3. On the Introduction page, type a name for the connector in the Name field.
  4. In the Select the intended use for this connector field, click Custom.
  5. On the Address space page, click Add.
  6. In the SMTP Address Space dialog box, specify the address to which you want to route the mail. To do this, enter the recipient’s domain name under Address space. to For example, enter SMSEAGLE_IP address (or smseagle.yourdomain.com if you use FQDN, see optional settings).
    If it’s applicable, click to select the Include all subdomains check box, click OK, and then click Next.
  7. On the Network Settings page, select Route mail through the following smart hosts, and then click Add.
  8. In the Add smart host dialog box, enter the FQDN of the smart host that you want to use to route mail to the recipient’s domain. For example, to send connector to route mail to the smseagle.yourdomain.com, use the smart host for yourdomain.com.
  9. Click OK.
  10. On the “Configure smart host authentication settings” page, select the method that’s used to authenticate to the smart host. By default, no authentication is used
  11. Click Next.
  12. On the Source Server page, select the Hub transport server that you are working on. To use a different Hub Transport server, click Add, and then select the Hub Transport servers that you want in the Select Hub Transport or Subscribed Edge Transport Server dialog box.
  13. To create the Send connector, click New.

Optional settings

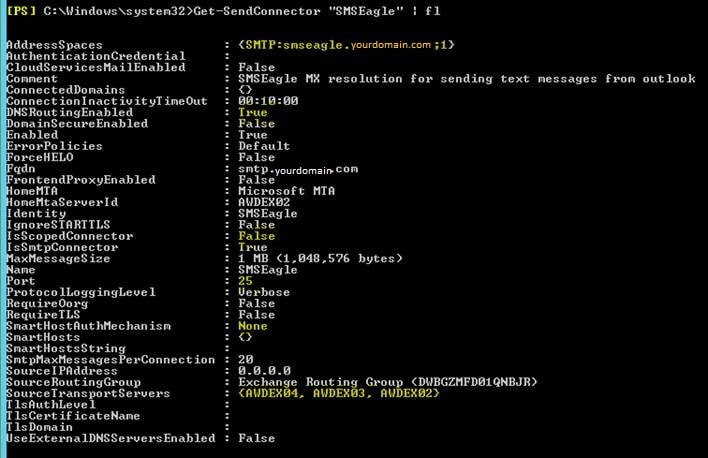
  • Optionally you can use FQDN address. First define the following DNS records for your SMSEagle device:
    Type: MX
    Name: smseagle.yourdomain.com
    Value: smseagle.yourdomain.com
    Type: A
    Name: smseagle.yourdomain.com
    Value: SMSEAGLE_IP

    Second, change Postfix configuration on SMSEagle to work with FQDN address:

    1. Login to console via SSH
    2. Edit file:
      (NPE-9300 family) /mnt/nand-user/postfix/etc/postfix/main.cf
      (NXS-9700 family) /etc/postfix/main.cf
      a) find line: myhostname = localhost.localdomain
      b) comment the line: #myhostname = localhost.localdomain
      c) add line: myhostname = yourdomain.com
    3. reload postfix config with command: postfix reload


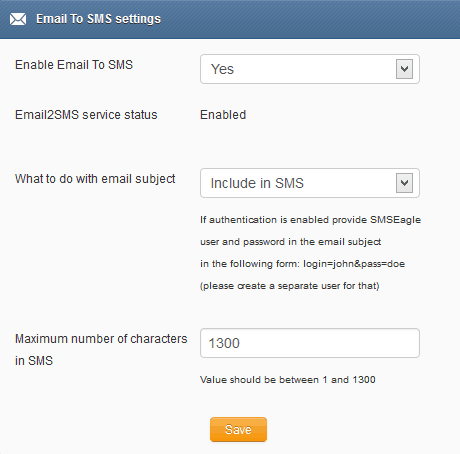
  • To allow external SMTP -> SMS delivery from the outside world:
    Exchange server has to be configured to allow the SMTP receive service to accept mail for the given domain name.
    You have to add an ‘Accepted Domains’ record for the domain name ‘smseagle.yourdomain.com’ and specified the domain type as ‘External Relay’.

    Please also edit Postfix configuration to accept emails when behind NAT (only if needed):

    1. Login to console via SSH
    2. Edit file:
      (NPE-9300 family) /mnt/nand-user/postfix/etc/postfix/main.cf
      (NXS-9700 family) /etc/postfix/main.cf
      Change line: proxy_interfaces = [your external IP address]
    3. reload postfix config with command: postfix reload

Example Send Connector configuration (based at one of our customer’s configuration)

Wake-up Calls & Text-to-speech Calls (optional)

SMSEagle device can be equipped with an additional voice feature that offers wake-up calls for urgent ring-only alerts or text-to-speech calls to convert text alerts into voice calls. Complete the following steps if you want to add a follow-up voice call:

  • in SMSEagle webGUI > menu Emails > Email to SMS edit the forwarding rule you created earlier
  • in the parameter “Call after sending SMS” choose a desired value:
    • Yes – ring only: SMS will be followed with a wake-up (ring only) call
    • Yes – text to speech: SMS will be followed with a simple text-to-speech voice call (English language only)
    • Yes – text to speech (advanced): SMS will be followed with a text-to-speech voice call (better quality & multiple language support)

Notice: Wake-up Calls and Text-to-Speech Calls are only available to users who have purchased the VOICE add-on for their SMSEagle device.

What is hardware
SMS Gateway?

Learn more about
SMSEagle features

Explore SMSEagle Demo device

SMSEagle is a hardware & software solution that guarantees a swift delivery of your messages to designated recipients, whether it’s for notifications, alerts, or important updates.

After registering to a demo you get a remote access to our physical device NXS-9750.

  • 14-days free trial
  • Access to over 20 functionalities